




Elven Elder (High Five) guide — Eva's Saint
Elven Elder class guide for Lineage 2 High Five: how to get the class, which skills to take, what to wear and where to level.
Contents |
EE Guide
- Freya

- Elven Elder - a support class, one of the 4 classes indispensable in any party (EE, BP, BD, SwS). The EE combines a healer, buffer and recharger at the same time. High casting speed lets her heal with Major Heal practically like a Bishop with Greater Battle Heal. The EE has a set of unique buffs - clarity, decrease weight, resist shock, which no other class in the game has. Recharge, combined with Clarity, high casting speed and a high men stat, makes the EE the best recharger. No other class has such a wonderful thing as party recall - an instant teleport of the whole party to town. On top of all that - the pretty look of light elf girls =) When playing an EE you have to understand that this isn't a DD, and for leveling and for having fun in the game you need a good constant party. The words about the EE's uniqueness were written before the Gracia Epilogue. update. Now our skills are available to SEs (4) and Bishops (1); SEs can claim the place of recharger and second healer. Perhaps in PvE there will now be no difference between SE and EE, just as between PP and Warcryer. In PvP the difference is obvious - BoE and 20% casting speed.
Elven Elder from 1 to 85
- 1-19
- Since Gracia 2, this stretch no longer exists, because the first class is taken very quickly thanks to quests.
Useful skills we get at these levels (I'll describe the skills at their max level right away):
- 7


- 20-39
- Now you're Elven Oracle; there's no way back to the conqueror classes. At this stage it's best to find a party. You can level solo in the EG on floor 2, after level 35 - in Hardin's Academy, DV. If there's no party in sight until a high level, it's better not to suffer solo but to get a nuker friend right away, or at worst a Bishop, or a window SH. Below I don't cover party leveling, since it depends on the lineup. At these levels you can dress in top common; D sets aren't for supports anyway.
- Skills:
- Now you're Elven Oracle; there's no way back to the conqueror classes. At this stage it's best to find a party. You can level solo in the EG on floor 2, after level 35 - in Hardin's Academy, DV. If there's no party in sight until a high level, it's better not to suffer solo but to get a nuker friend right away, or at worst a Bishop, or a window SH. Below I don't cover party leveling, since it depends on the lineup. At these levels you can dress in top common; D sets aren't for supports anyway.


- 40-51**


- Weapon:
 Mysterious/Homunkulus's Sword SA Acumen. Mysterious Sword uses only 2 spiritshots, a blunt - 3.
- Weapon:

Pay attention to SA Conversion (+60% mp, -40% hp) and Mana UP (+30% mp). A secondary weapon with such an SA can come in handy for leveling, especially in locations with herbs, where the full-MP-restoring Superior Herb of Mana. drops
- Jewelry: common top C.
- Tattoos: there are 2 options
- +4 con -5 str, +4 wit -4 men, +1 wit -1 men - max casting speed.
- +4 con -5 str, +4 wit -4 men, +4 dex -5 str - +5 running speed; compared to option 1, casting speed is 5% lower and M. Def. is about 1% higher.
The choice of tattoos depends on the party makeup and your play style. Running speed matters in PvP, and you can boost it with talismans: yellow talisman - speed gives +3 speed, yellow talisman of speed gives +5 speed, yellow talisman of alacrity +3 speed. All three talismans can be worn at the same time (at 61+ with an A-grade bracelet) for +11 speed.
- Solo leveling: 40-44 Hardin's Private Academy, Dragon Valley, The Forest of Mirrors (on the ghosts), 44+ in Inquisitor around Ivory Tower, Outlaw Forest.
- Skills:


- 52-60


- Weapon: if you have a party, you can run with a Mystic Sword even up to 76. For solo leveling, an OE blunt or a Valhalla with Acumen is better.
- Jewelry: common B/top C.
- Solo leveling: The Cemetery, Fields of Massacre, Forsaken Plains.
- Skills:


- 61-75
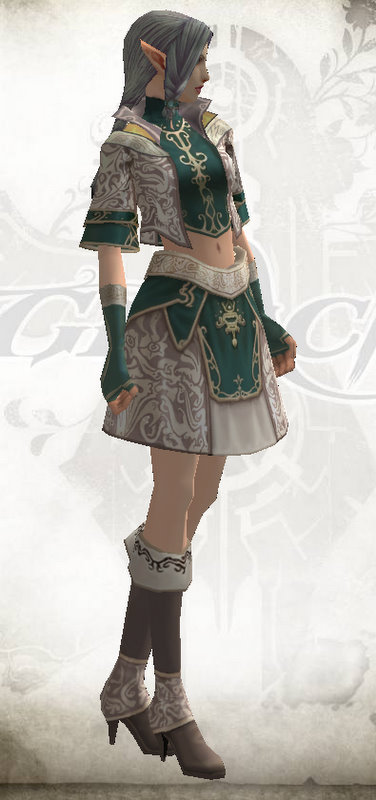
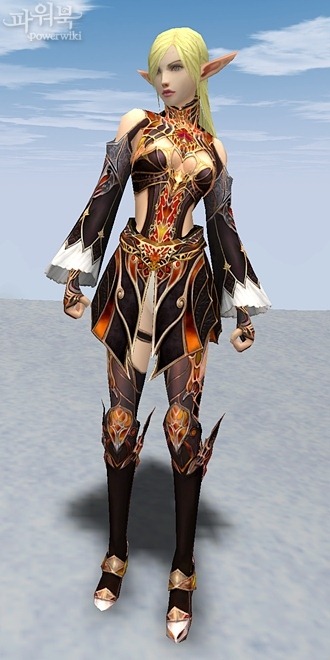
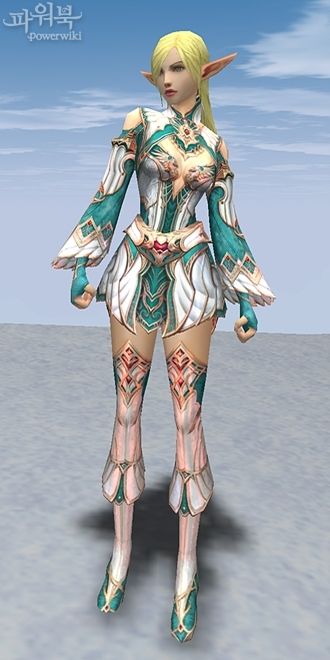
- Armor:
- 61-75
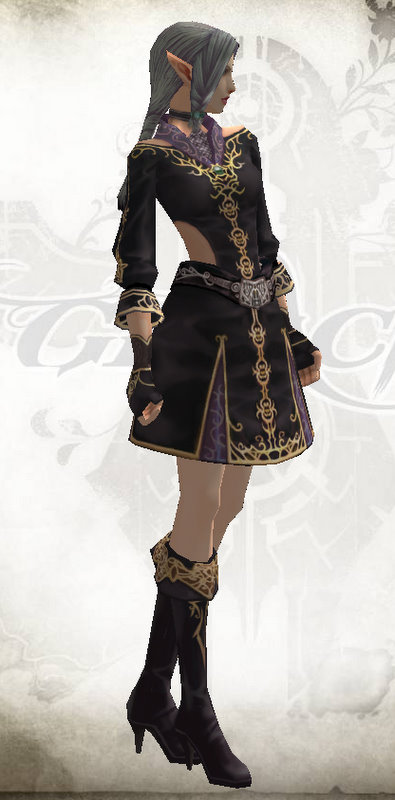
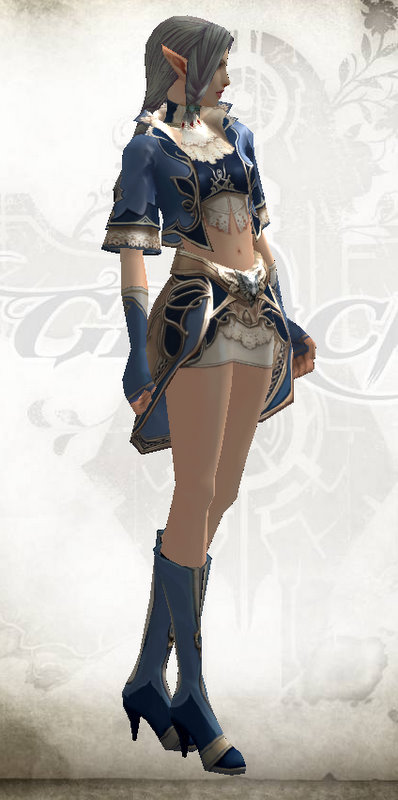
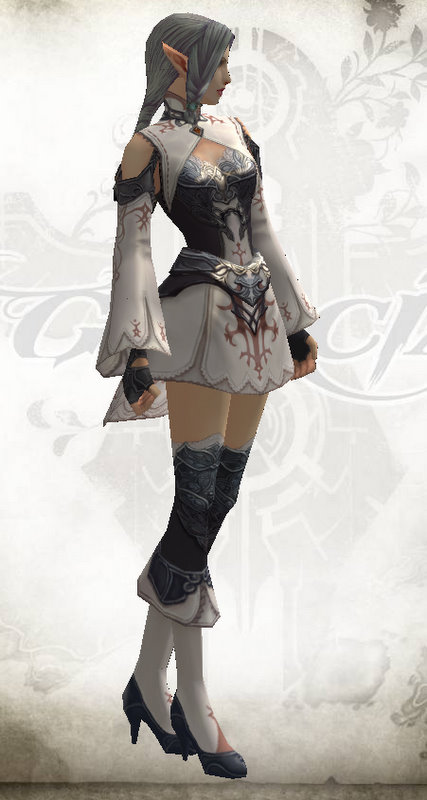
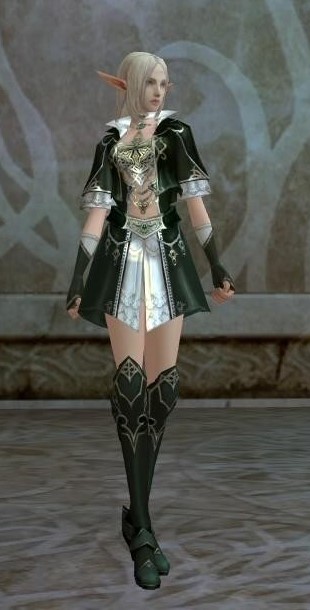
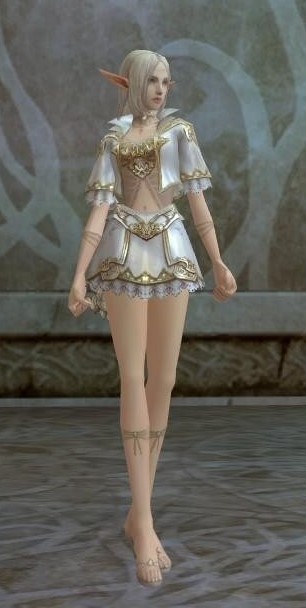
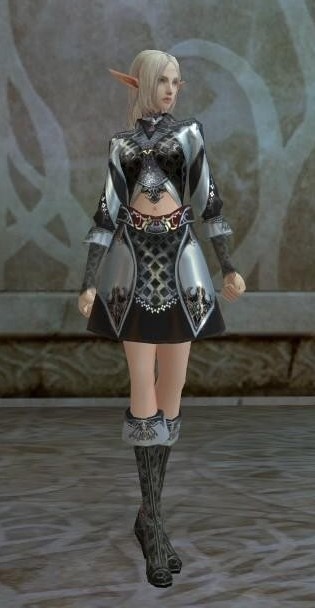
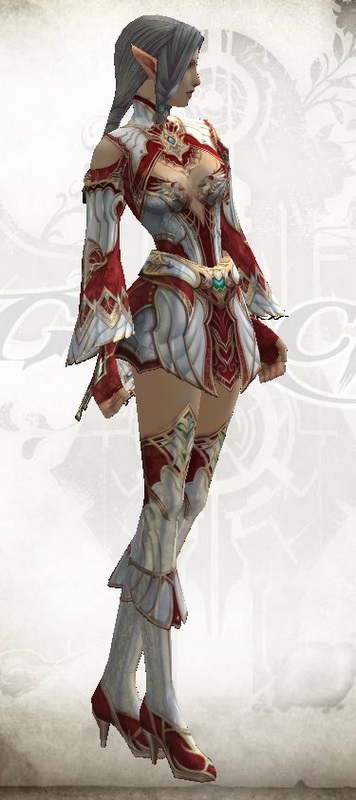
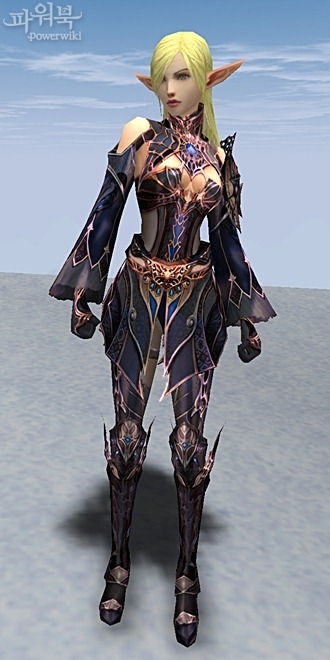
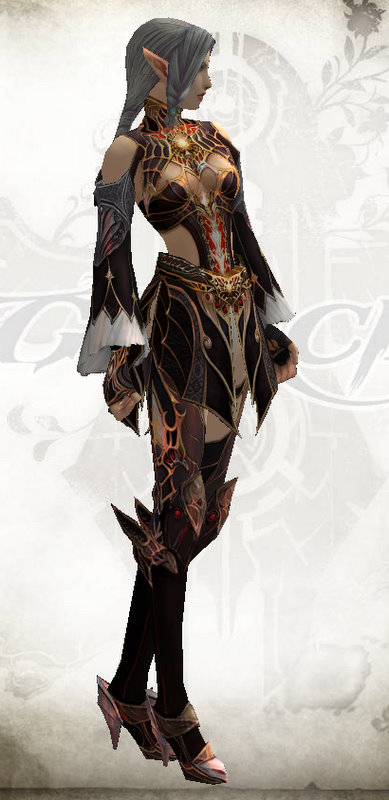
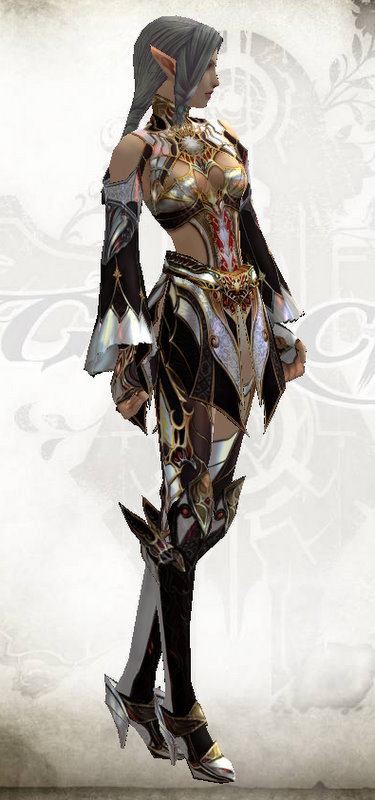
EEs on all servers still haven't agreed which set is better - Dark Crystal or Majestic.


- Weapon: for party leveling, any weapon with Acumen; for solo, SoM or OE C/B grade with Acumen.
- Jewelry: preferably at least a common Majestic set (ideally an unsealed enchanted Majestic), but you can enchant BO to +3 and get roughly the same.
- Solo leveling: Forest of the Dead.
- Skills:


- 76-79


- Rare bonuses:
- Dynasty Stockings (2% m atk, 133 mp, 3 dark resist)
- Dynasty Circlet (1.2% m atk, 80 mp, 2 dark resist)
- Dynasty Gloves (0.8% m atk, 53 mp, 1 dark resist)
- Dynasty Boots (0.8% m atk, 53 mp, 1 dark resist)
- Rare bonuses:
There's no consensus here either on which is better - MA, DC or MJ set. I think the ideal option is the DC set +6.
- From level 76 we get the passive Sigil Mastery, which, when wearing sigil, increases heals by 30 and MP regen by 17%. Sigil - a very good thing for leveling, but in PvP it's better to wear a shield.
- Weapon:
 Arcana Mace SA Acumen. If you have a party, the attribute doesn't matter. For solo leveling in Inquisitor - Arcana Mace 150 holy.
- Jewelry: Tateossian/epics
- Solo leveling: Rift, Pagan - with lethals (Turn Undead). Whether the lethal lands doesn't depend on M. Atk. or shots, only on the skill level. You need a party for the Rift. To level solo, just take a twink into your party, give him dimension fragments and leave him somewhere far away. XP in the Rift is good, but expensive because of the cost of Spirit Ore and dimension fragments.
- Skills:


Skill Transfer
After getting the 3 class, we can learn one SE or Bishop skill. The skill can be canceled for 10kk to take another one. The skills can be enchanted. The choice depends on your static party makeup, PvP or PvE focus, and the Olympiad. The list of all skills:


- Purify - an indispensable PvP skill for a party with two healers, BP+EE.
- Greater Battle Heal - the best option for the open Olympiad.
- Magical Backfire - for the class-based Olympiad/a party with three healers, BP+EE+SE/EE.
- Stigma of Shilien - in melee parties.
- Empower - this option works in magic parties, for duo leveling with a mage, or solo.
- Mass Resurrection - may suit a party with three healers.
80+

- Rare bonuses:
- Moirai Hose (m atk +1.03%, 5% paralysis resistance, water attribute +5)
- Moirai Circlet (m atk +0.62%, 5% paralysis resistance, fire attribute +5)
- Moirai Gloves (m atk +0.41%, 5% paralysis resistance, wind attribute +5)
- Moirai Shoes (m atk +0.41%, 5% paralysis resistance, earth attribute +5)
- Rare bonuses:


- Rare bonuses:
- Vesper Hose (m atk +0.68%, mp regen +0.68, stun resistance +12.5%, casting cancel probability -7.5)
- Vesper Circlet (m atk +0.41%, mp regen +0.41, stun resistance +7.5%, casting cancel probability -4.5)
- Vesper Gloves (m atk +0.27%, mp regen +0.27, stun resistance +5%, casting cancel probability -3)
- Vesper Shoes (m atk +0.27%, mp regen +0.27, stun resistance +5%, casting cancel probability -3)
- Rare bonuses:


The choice of set depends primarily on the server and whether you have epic jewelry; essentially it's a choice between stun and paralysis resistance. At the Olympiad it's best to have 2 sets - Moirai and Vesper/Vorpal.
- Weapon: Dynasty Mace/Phantom, Icarus Hall/Spirit, Vesper Caster/Buster, Rising Star, Veniplant Sword SA Acumen
- Jewelry: S80-84/epics/TW jewelry
- Solo leveling: Primeval Isle, Fields of Silence, Fields of Whispers.
- Skills:


At this stage you may run short of SP for learning skills. So it's better to skip some skills (for example Health, Skill Mastery) to learn the most needed ones: PoW, Arcane Wisdom, Divine Lore, Mana Gain, Mass Recharge.
Skills Enchantment
The skill level (learn lvl) rises with the skill's enchant level. This is important to know when enchanting debuffs (trance, block ww, wind shackle, erase) and recharge. To avoid a penalty on recharge, the difference between the skill level and the level of the character being refilled must be no more than 5. Recharge +0 is a level 74 skill. To refill a level 85 character without a penalty, recharge must be at least level 80, i.e. +13. It's also worth enchanting the main PvP buffs, since a buff's level affects the chance of it being canceled.
- For 2 class skills:
- +1 = level 76
- +4 = 77
- +7 = 78
- +10 = 79
- +13 = 80
- +16 = 81
- +19 = 82
- +22 = 83
- +25 = 84
- +28 = 85
- For 3 class skills:
- +1 = 81
- +4 = 82
- +7 = 83
- +10 = 84
- +13 = 85
Skills that need enchanting (the most effective enchant routes, in my opinion, are listed first):
- +0 - 10% clarity
- +6 - 11%
- +12 - 12%
- +18 - 13%
- +24 - 14%
- +30 - 15%
- +0 - 5% clarity
- +1 - 6%
- +8 - 7%
- +15 - 8%
- Arcane Wisdom - power
- +0 - 30% clarity
- +3 - 31%
- +6 - 32%
- +9 - 33%
- +12 - 34%
- +15 - 35%
- """Turn Undead - attack; enchant to +1 to level solo in the Rift/Pagan. You can enchant higher to raise the skill level so you can use it on 80+ mobs (Seed of Infinity, Hellbound).
Subclass Skills
When your subclass reaches levels 65 and 70, the main class can learn common skills (Emergent Ability) that raise P. Def., M. Def., M. Atk. and P. Atk. When the subclass reaches 75, you can learn similar common skills (Master Ability) or subclass-dependent skills (Special Ability).
- Emergent Ability 65, 70 lvl:
- Magic Defence: 13-15 m def
- Physical Defence: 8-9 p def
- Master Ability 75 lvl:
- Great Magic Defence: 50 m def
- Great Physical Defence: 29-30 p def
Whether to choose P. Def. or M. Def. is up to you. Obviously the M. Def. bonus is bigger. It's important to pick one thing to boost that stat as much as possible. If you take all the M. Def. skills from 3 subs, you get +240 M. Def. If all P. Def., the bonus is about 140 P. Def., which is also a lot.
- Special Ability 75 lvl; the interesting skills for us are:


Augmentation
- In the main weapon:
- Any active nuke 10 lvl 110 power is needed for the Olympiad in a S/S80/S84 weapon 150(300) of the matching attribute. To perform well at the Olympiad, it's best to have 2-3 weapons with different nukes.
- Passive Spell Clarity lvl 3 gives 20% Clarity; a good augment for PvE.
- In the secondary weapon (better to insert into a low C, augmentation will be much cheaper):
- Active Refresh reduces skill reuse by 15%; lasts 1 minute, reuse 10 minutes.
- Active Magic Barier lvl 10 +77 m def regardless of buffs, lasts 2 minutes, reuse 5 minutes.
- Active Shield lvl 10 +71 p def regardless of buffs, lasts 2 minutes, reuse 5 minutes.
- Active Blessed Body lvl 10 +300 hp; lasts 2 minutes, reuse 5 minutes.
- Active Wild Magic lvl 10; lasts 2 minutes, reuse 5 minutes.
- Active Lesser Celestial Shield - invincibility for 7 seconds, reuse 30 minutes; disappears on any action. The special thing about this augment is that it doesn't replace other augment buffs, while all the others replace each other.
MP Regeneration & Clarity
- Boosting MP regen:
- Majestic Robe Set +8%
- Sigil +17%
- AM SA MP Regeneration 3-4% (suitable for PvE only)
- PoW +20%
- Magnus' Chant +4 MP per tick
- Song of Meditation +20%
- Embroider +2 MP per tick
- Blessing of Seraphim +35%
- Fast Mana Recovery enchanted for power
- Robe Mastery enchanted for MP regen; +1 gives +4 MP per tick while sitting (suitable for PvE only)
- Talismans: Yellow Talisman of MP Regeneration, Yellow ***Talisman of Mental Regeneration, Red Talisman of Mental Regeneration, Red ***Talisman of Meditation.
- Clan Clarity +3%
- Residence Clarity +0,47 to MP regen (Aaru Fortress, Valley Fortress)
- Infinity Rod +0.51 to MP regen, +30% MP
- Magic Rune Clip Belt MP Recovery a top A-grade belt gives about +0.5 MP per tick
- Boosting Clarity:
- Arcane Wisdom 30% (+3 - 31%, +6 - 32% ...)
- Clarity 10% (+6 - 11%, +12 - 12% ...)
- Divine Lore 5% (+1 - 6%, +8 - 7% ...)
- PoW 5%
- Song of Meditation 10%
- Song of Renewal 5%
- Passive Spell Clarity lvl 3 20%
- Antharas Earring 5%
- Magician 's Will 5%
- Enlightenment 90% for 20 seconds
- Talismans: Red Talisman of Minimum (~4%) and Maximum Clarity (100%)
- Holy Squad 5% clarity, 30% mp
- Masterwork SA Wisdom 5%
Clarity has no cap (limit); you can boost it even to 100%. But the MP amount written on a skill is split into 2 parts during casting. At the start of the cast the 1nd part of the skill is spent, 20% of the cost. The remaining 80% is spent when the skill finishes casting. Clarity affects only the second part of the skill. For example, 90% Clarity, written on the skill Enlightenment, makes up 72% of the skill's full cost.
Pets
It's useful for an EE to get the bird Improved Baby Kookaburra (Baby Kookaburra), which refills MP and buffs Empower (handy in archer/melee groups where this buff is missing). The Recharge penalty is 15 levels, and for the kookaburra you take the level at which the skill is given, i.e. 55, 60, 65, etc. The maximum level difference is 24; if the difference is bigger, Recharge won't work. At level 55 the kookaburra refills 120 MP, at 60 - 128, 65 - 138, 70 - 144, 75 - 149, 80 - 153. It starts refilling MP if your MP is below 60% and you're in combat mode. You can also refill the bird itself and buff Mana Gain on it (a kind of self Recharge). It's also handy to load Spirit Ore on it for leveling and GCP for PvP.
- Buffs:
- Level 55 - Empower 3 (2 Minutes), BtS 6 (20 Minutes)
- Level 60 - BtB 6 (20 Minutes), Shield 3 (2 Minutes)
- Level 65 - Concentration 6 (2 Minutes), Acumen 3 (2 Minutes)
Tactics in PvP
Before PvP you need to check all your party members' buffs and refill MP for everyone who needs it. The main PvP buffs: Mental Shield, Resist Shock, Clarity, Concentration, Improved Shield Defense, Decrease Weight, Wild Magic, Mana Gain. During PvP you need to heal party members, refill MP in time and watch the party's buffs - for this, play with the buff bar open (alt+f); rebuff after cancel when possible, and resurrect the Bishop first. Don't forget to turn on Arcane Wisdom.
If it's not mass PvP but, say, a gank, the EE is the first target for enemy DDs, so they can't do PR. The tactic here is simple - survive as long as possible. Celestial Shield, Turn to Stone and Enlightenment. can help with this. Also use your position - any corner, rock, tree or pillar you can hide behind from focus.
In PvP against a dagger group, use Mana Burn, Block WW and Wind Shakle. on the enemy DDs. If one dagger user focuses you, be sure to turn to face him and Mana Burn/debuff. If there are several daggers, all you can do is kite, hoping for the Bishop's heals and the BD/SwS's aggro.
In PvP against a magic group, EEs and BPs are usually focused last because of their high M. Def. In that case the main thing is to heal your party members; if the enemy mages cancel, watch the buffs and rebuff (so everyone has Mental Shield, otherwise Silence may land on the Bishop, plus the Overlord's debuffs), and use Mana Burn and Block WW. when possible
In PvP against archers, on the contrary, it's better to run right up to the DDs (not running ahead to tank at the very start of the PvP, of course =)), throw Wind Shakle, Block WW on them and Mana Burn the healers. Before PvP, check that your shield is on and Resist Shock is buffed on everyone in the party.